A step-by-step guide to setting up Google Play In-App Updates
Introduction
As an Android app developer, you might think about how to get users to update your app. Some users do not turn on auto-updates. They also do not check for updates by themselves. This makes it hard to make sure everyone uses the latest version. You could try to build your own way to ask users nicely to update. But good news, Google already has a tool for this. It is called Android In-App Updates.
In-App Updates means you can update the app from inside the app itself. This is easy for users. It works on devices with Android 5.0 or higher. You need the Play Core Library version 1.5.0 or later. Your app must be on the Google Play Store already. But it does not work with APK Expansion Files, those .obb files. Even with this limit, it is a good way to keep users with the best version of your app. You can fix bugs and add new things without users going to the store every time.
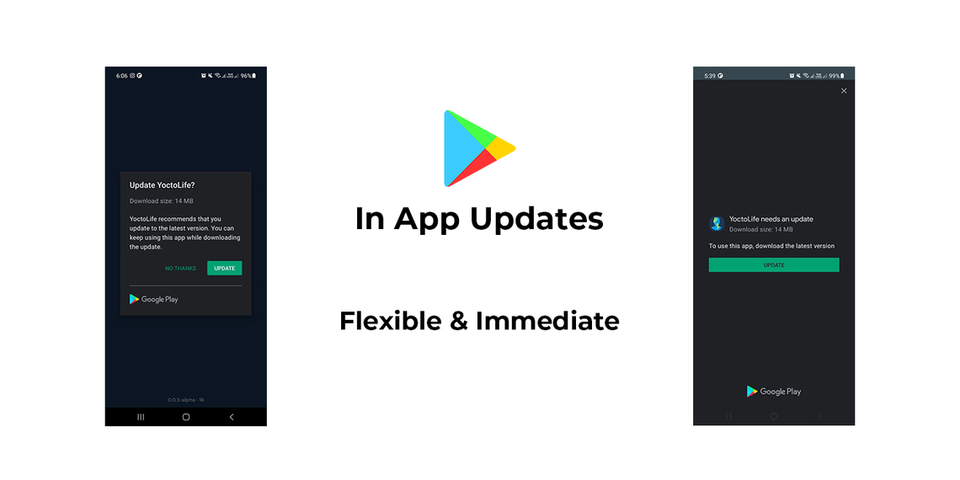
There are two types of updates. First is Flexible Updates. This is good for small changes. It does not bother the user much. The update happens in the background. Users can keep using the app while it downloads. They can choose to install later. Second is Immediate Updates. This is for important fixes, like security problems. It blocks the app until the user updates. They must update or close the app. These choices let you pick what fits your needs. For example, if it is a small improvement, use flexible. If it is critical, use immediate.
In my experience as a developer, this feature has saved me a lot of trouble. Before, users would stick with old versions and report bugs that I already fixed. Now, with in-app updates, I can remind them gently or force it when needed. It keeps the app better for everyone. Plus, it makes users feel like the app cares about staying fresh.
How It Works
Google Play In-App Updates has two main ways to do updates, as I said before. You might wonder how it really works under the hood. It is actually simple. You use something called AppUpdateManager. This checks with Google Play if there is a new version for your app. It uses your app's package name to ask. Then, it tells you if an update is available. If yes, you can start the update process, either flexible or immediate. That is the basic idea.
If you always want the same type of update, like always flexible, you do not need to do more. Just check for update and start it. But sometimes you want to change based on situations. That is when you look at more info from Google Play. They give you Update Staleness and Update Priority. These help you decide what to do.
Update Staleness tells you how many days ago the new version came out on the Play Store. For example, if the update is new, maybe you use flexible. But if it has been out for a month and the user still has not updated, you can switch to immediate to push them. Update Priority is a number from 0 to 5. 0 means not important, 5 means very important. You can use this to decide too. Like, if priority is 5, always use immediate. But at the time I wrote this, you can not set priority from the Play Console website. You need the Google Play Developer API for that.
This system is smart because it lets you control how strong you push the update. In my own apps, I use staleness to give users time. If the update is fresh, I let them choose. But after a week or two, I make it more urgent. This way, important fixes get to users faster without annoying them all the time. Priority helps when you have a big security issue. You set it high, and the app forces the update right away. It is all about balance, keeping users happy but also safe.
How To Implement
After all of that information then I will give a step by step how to implement this feature on your apps, either its new app or existing app. The requirement here it's already uploaded to Google Play Store, not using APK Expansion Files (.obb), and can only be used on devices running Android 5.0 (API level 21) or higher.
Simple Example
The goal here on the simple example is to make an flexible or immediate updates without having logic for checking the Update Staleness and Update Priority. We will talk about that later on the next section of article, you can skip to the advanced example if you're more interested about that one.
OK First, we need to add the Play Core Library to the build.gradle (app). At this moment of writing the newest version is 1.10.0, make sure you're using the latest version. You can check the latest version here.
Then, in the Main activity we need to create an instance of the AppUpdateManager, request the update availability, then start the Flexible updates if there is update available. Here is the sample code.
That's it, you already added Google Play In-App Updates to your app using Flexible updates. You can simply change AppUpdateType.FLEXIBLE to AppUpdateType.IMMEDIATE to change to Immediate update flow.
Advanced Example
Now what if we need more than that? For example we want to use Update Staleness and Update Priority to make the decision whether we are going to use Immediate or Flexible updates. To make it simple, look at this table for our update strategy scenario.
| Priority | < 7 Days | > 7 Days |
|---|---|---|
| 0 | Flexible | Flexible |
| 1 | Flexible | Flexible |
| 2 | Flexible | Flexible |
| 3 | Flexible | Immediate |
| 4 | Immediate | Immediate |
| 5 | Immediate | Immediate |
Based on that table, users with Priority 0 to 2 always receive Flexible Updates, regardless of update staleness. For Priority 4 and 5, users always get Immediate Updates. However, for Priority 3, the update type varies with update staleness. If the staleness is under 7 days, they receive Flexible Updates, but after 7 days, they receive Immediate Updates.
So we need to modify our code from the above one to cater this scenario. The changes that we need to do here are on the success listener of appUpdateInfoTask, instead of directly start the flow if the update available, we also need to check the staleness and priority. Here is the sample code:
Finished? Well, not really. We already handle the client side which will update it based on the priority and staleness but we aren't setting up the priority yet using Google Play Developer API.
Set Priority Using Google Play Developer API
To be able to upload to Google Play via the Play Developer API, we are required to link the Google Cloud project to the Google Play Console. This step is required if we want to use Update Priority in the In App Updates feature. If not, this section can be skipped and directly uploaded as usual using Google Play Console.
Linking Google Cloud Project to Google Play Console
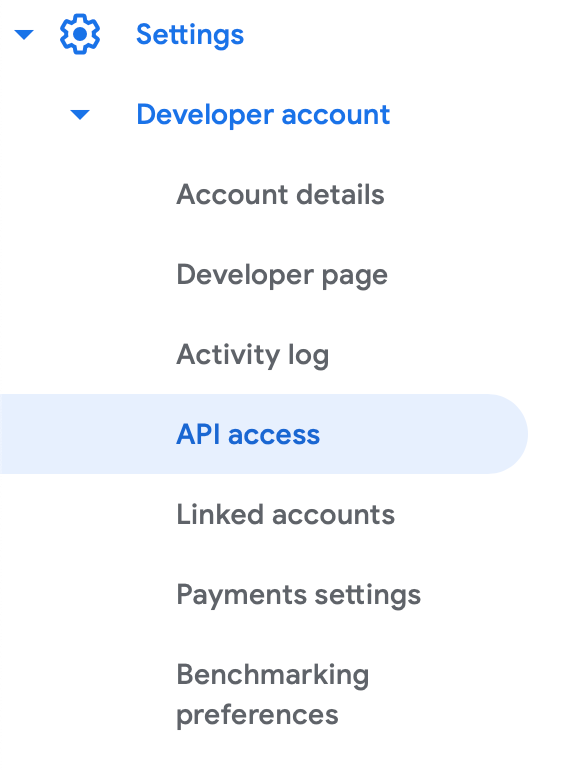
- Open Google Play Console
- Choose Settings > Developer Account > API Access
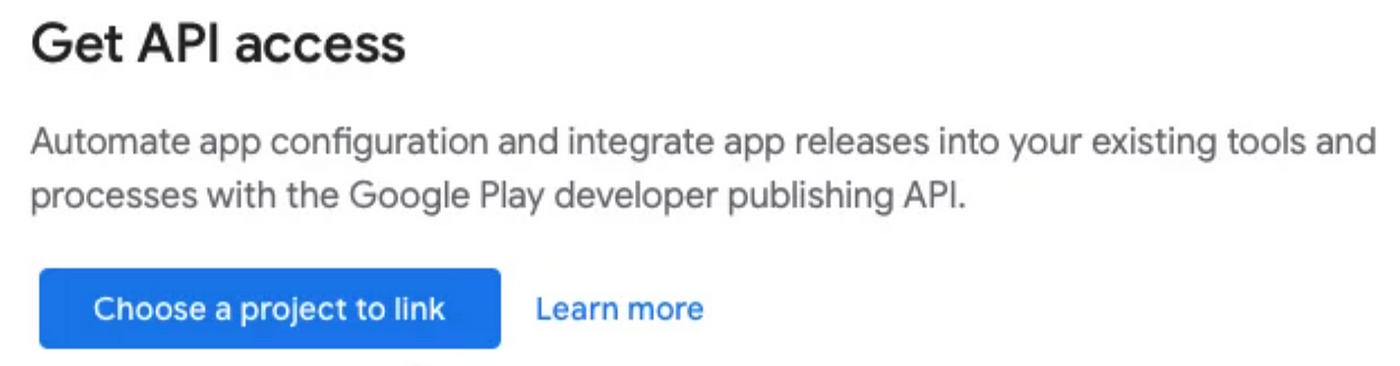
- Click Choose a project to link
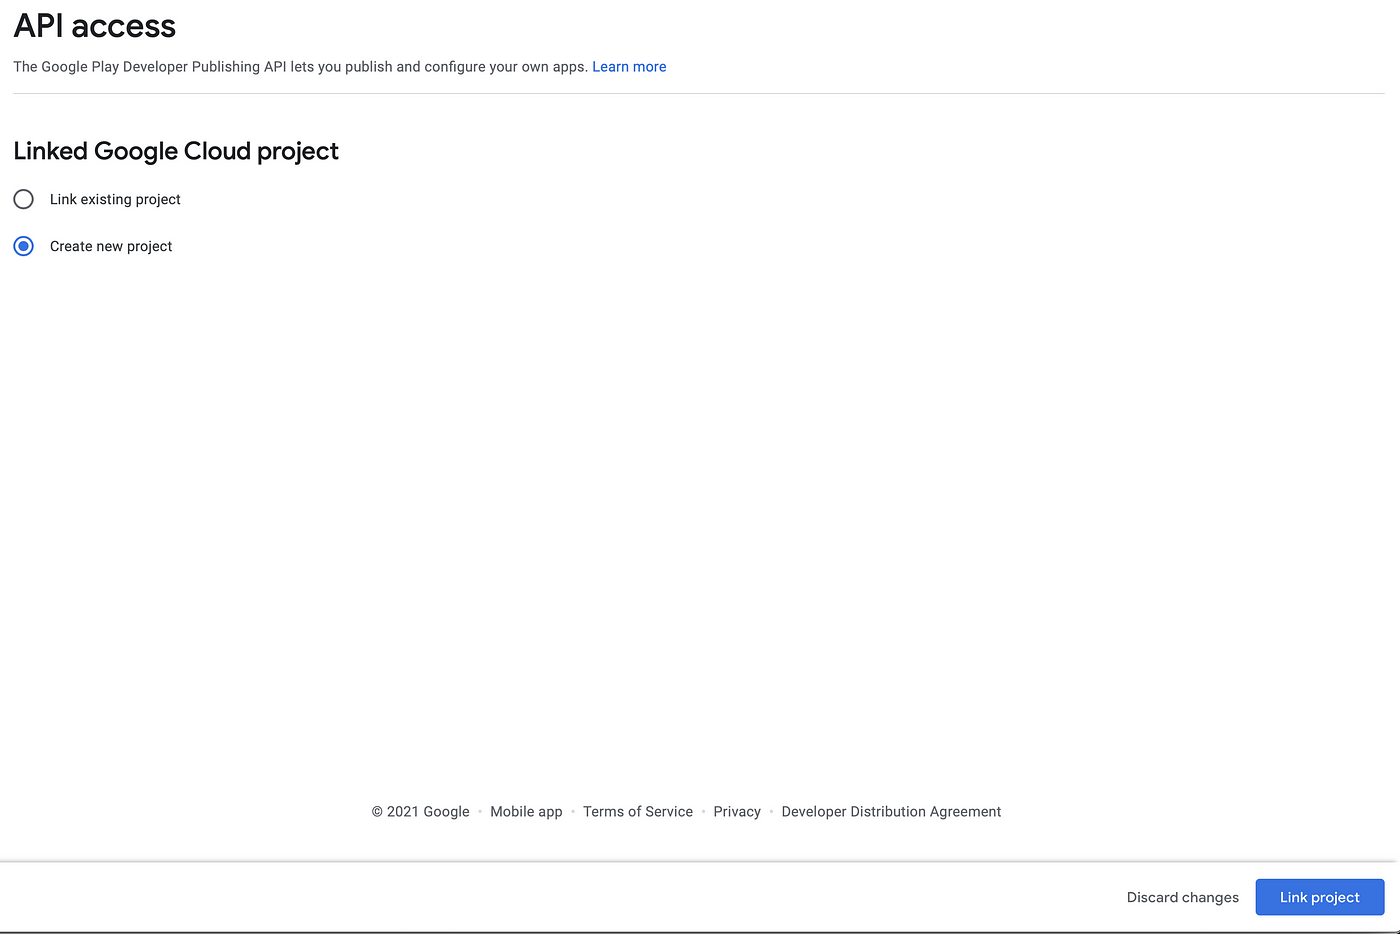
- If you already have a Google cloud project, choose Link existing project, if not, you can choose Create new project
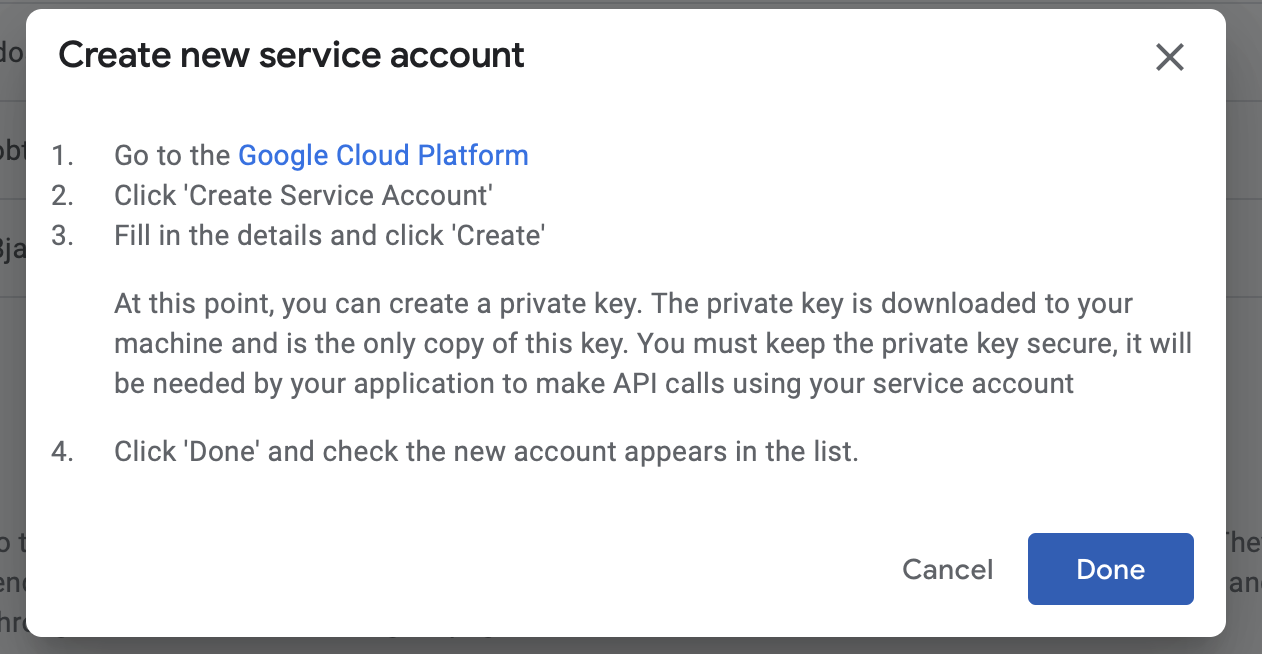
- Choose Create new service account

- A popup will appear like this, then open Google Cloud Platform

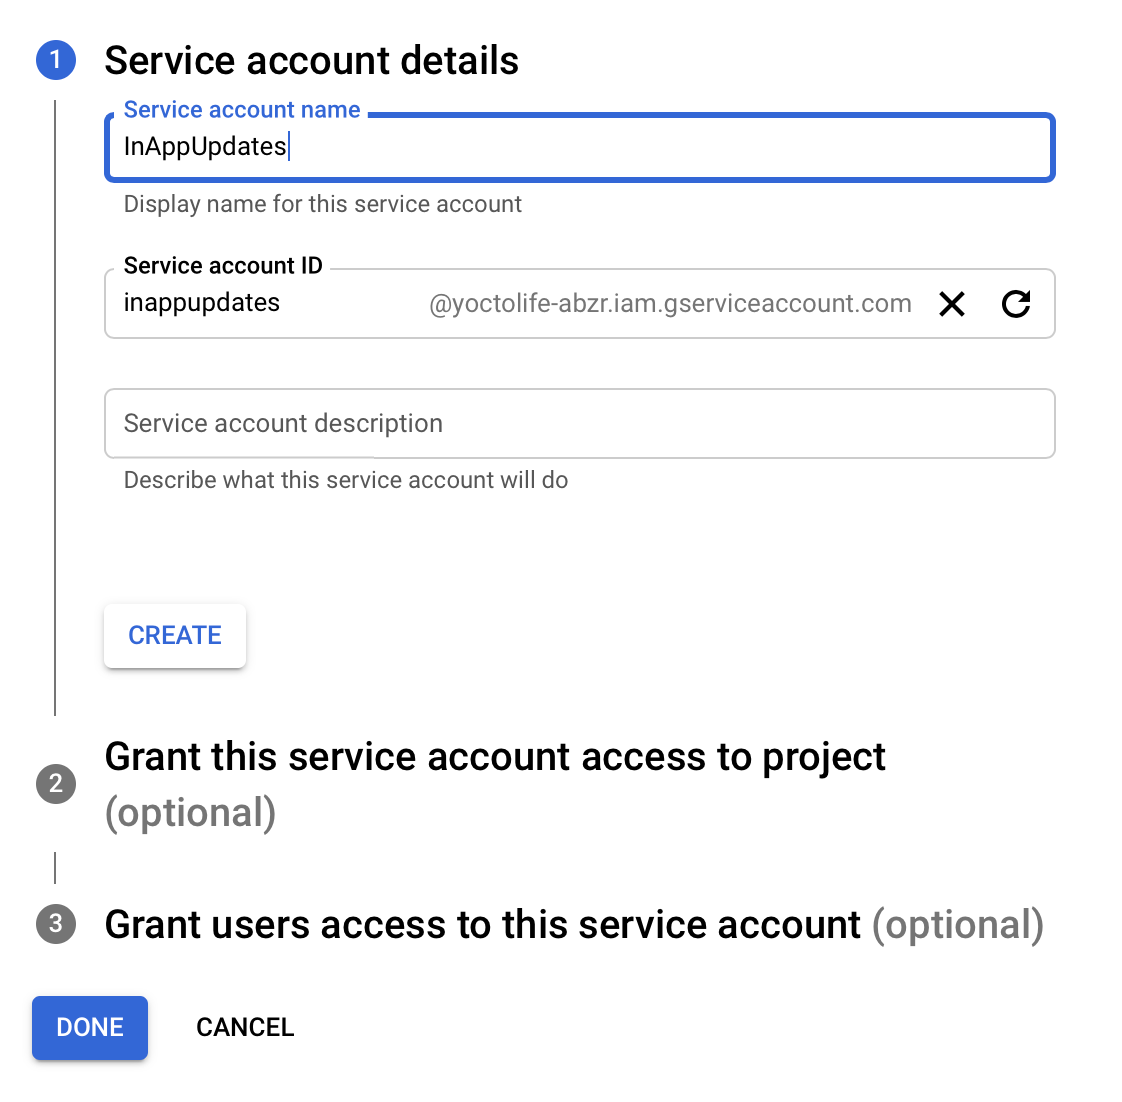
- Click on Create Service Account

- Fill in the name, and click Create
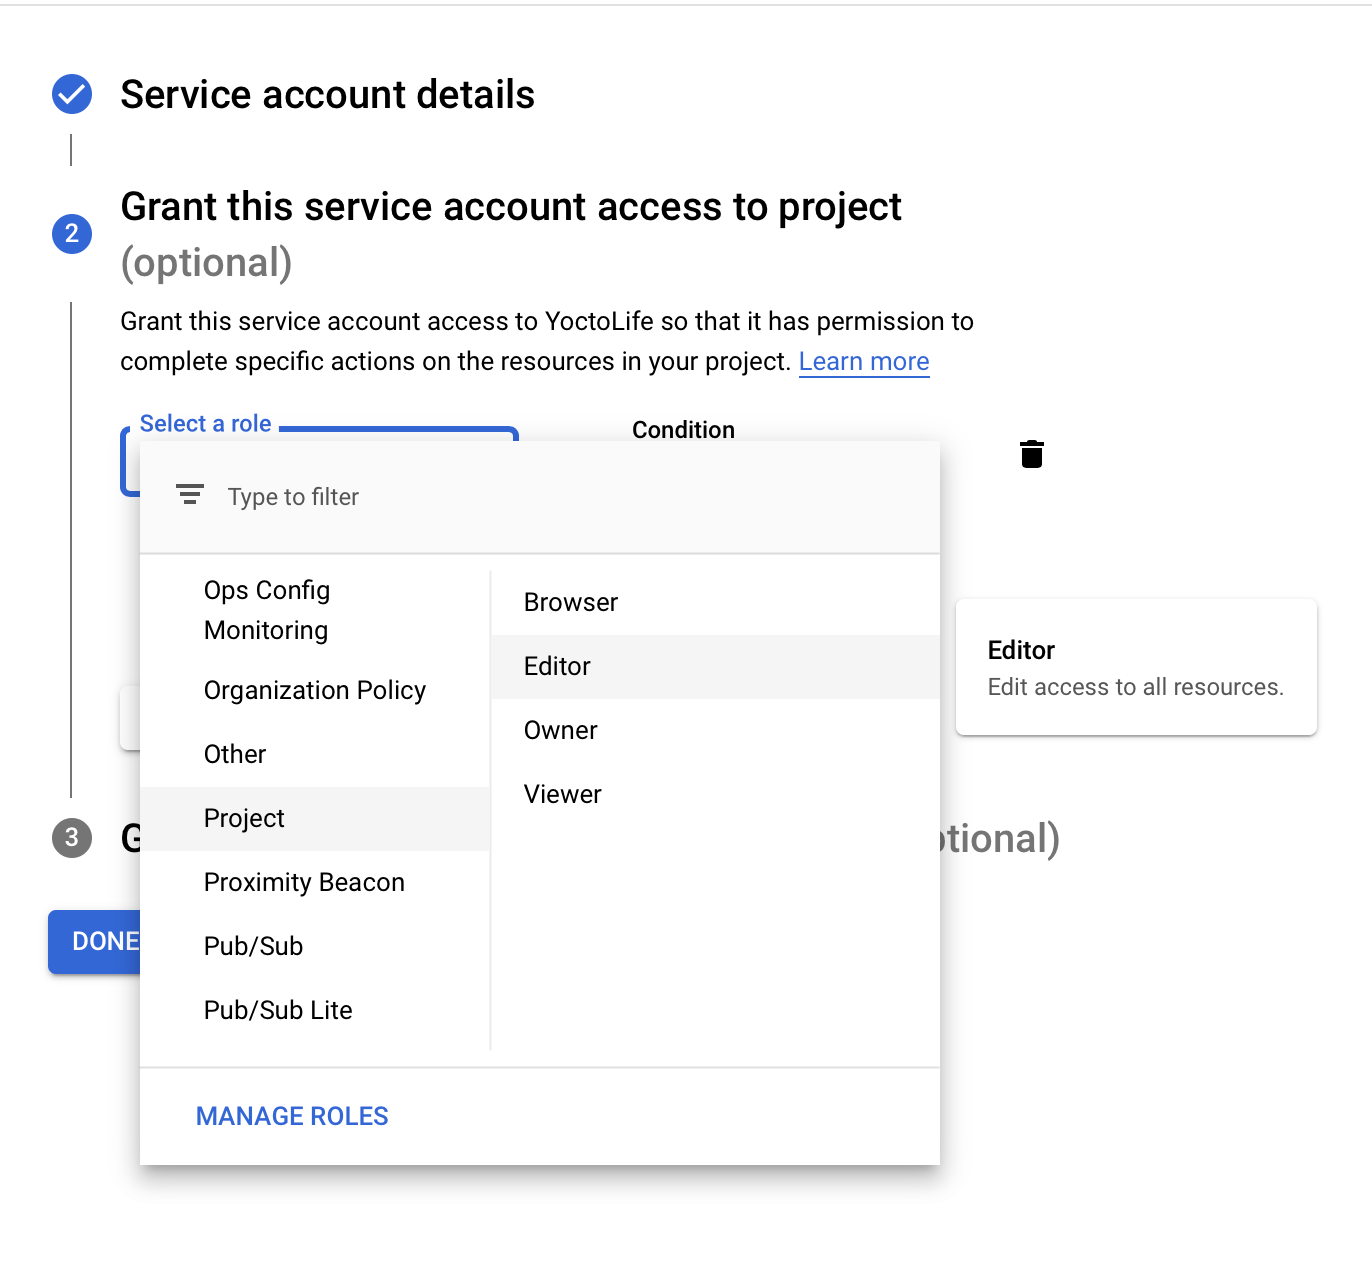
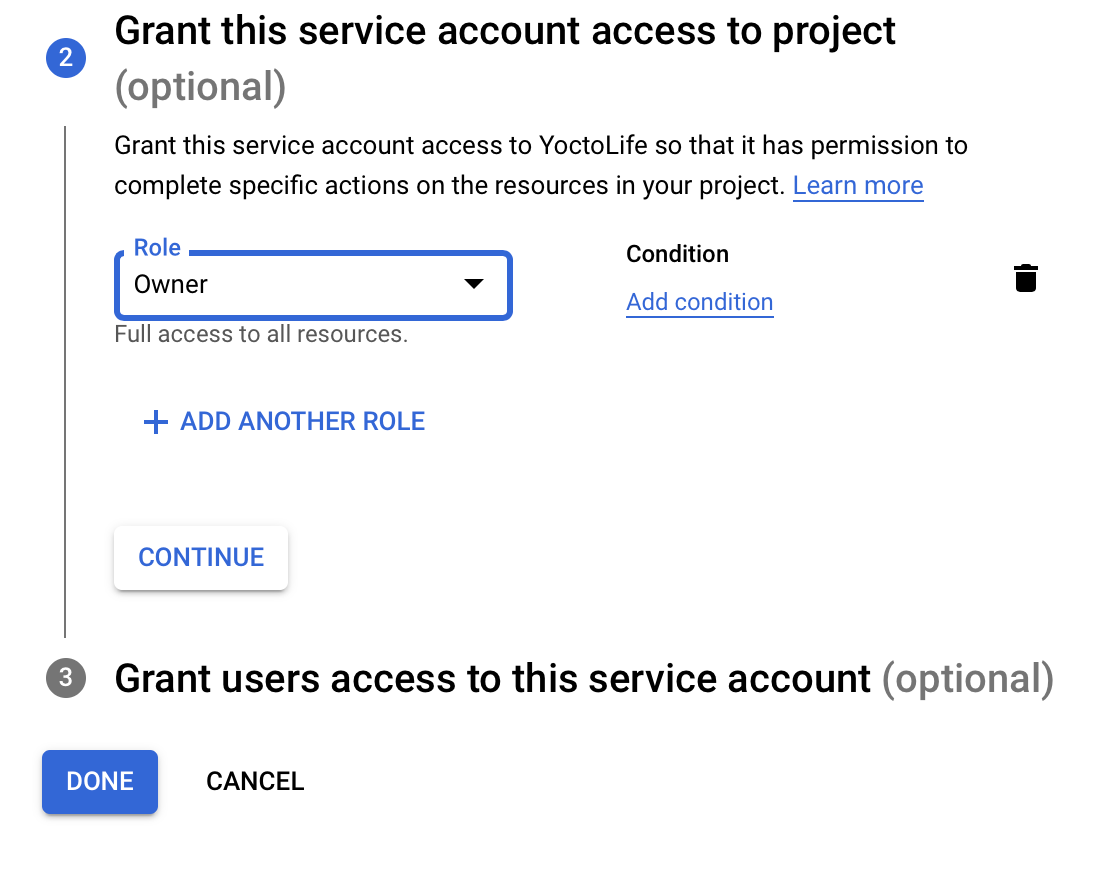
- In the next step, select Owner as the role, and click Done.
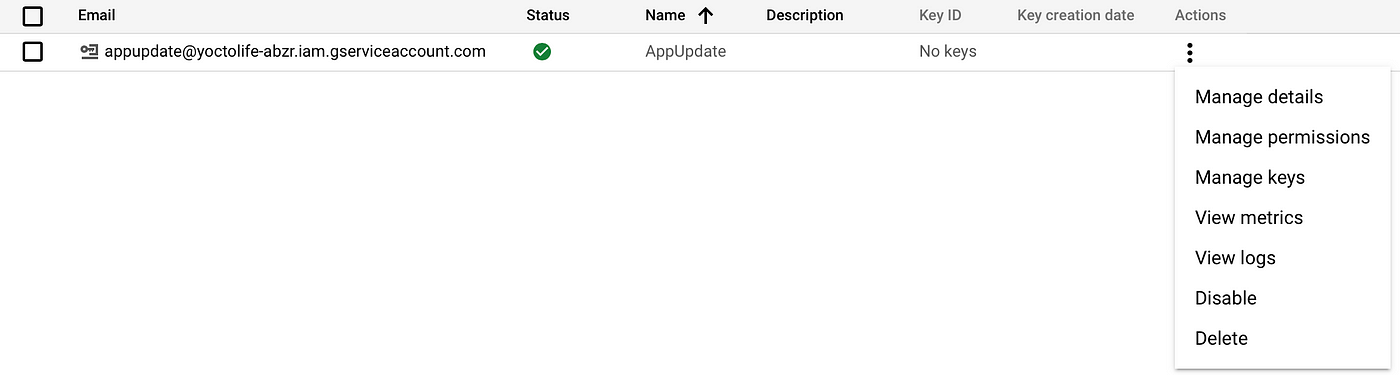
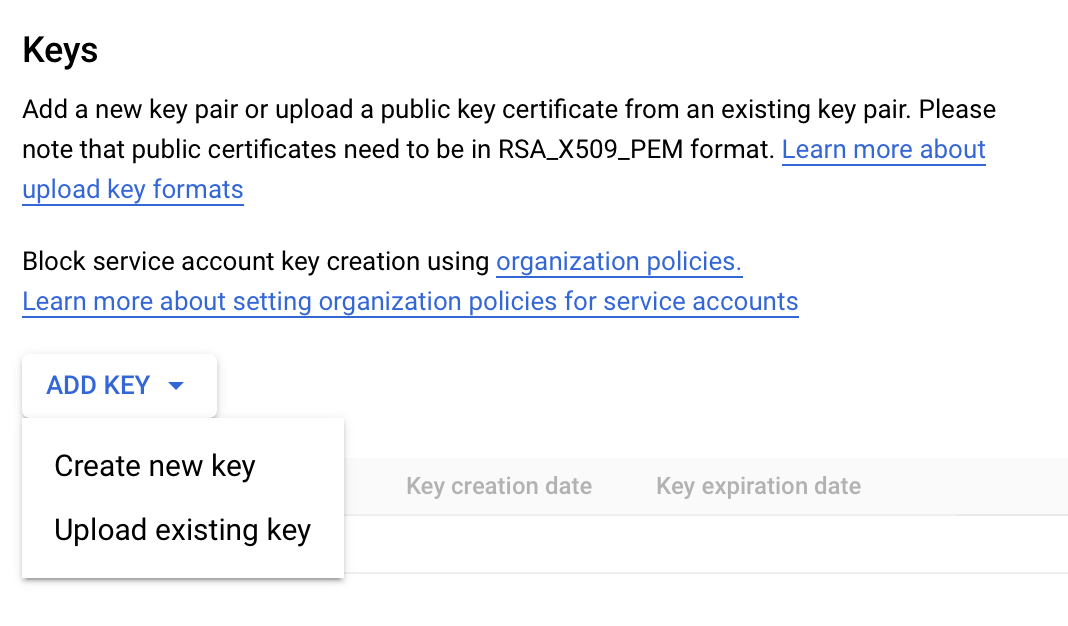
- Click the Actions icon and select Manage keys
- Click Add Key dan choose Create new key
- Choose JSON and then click Create
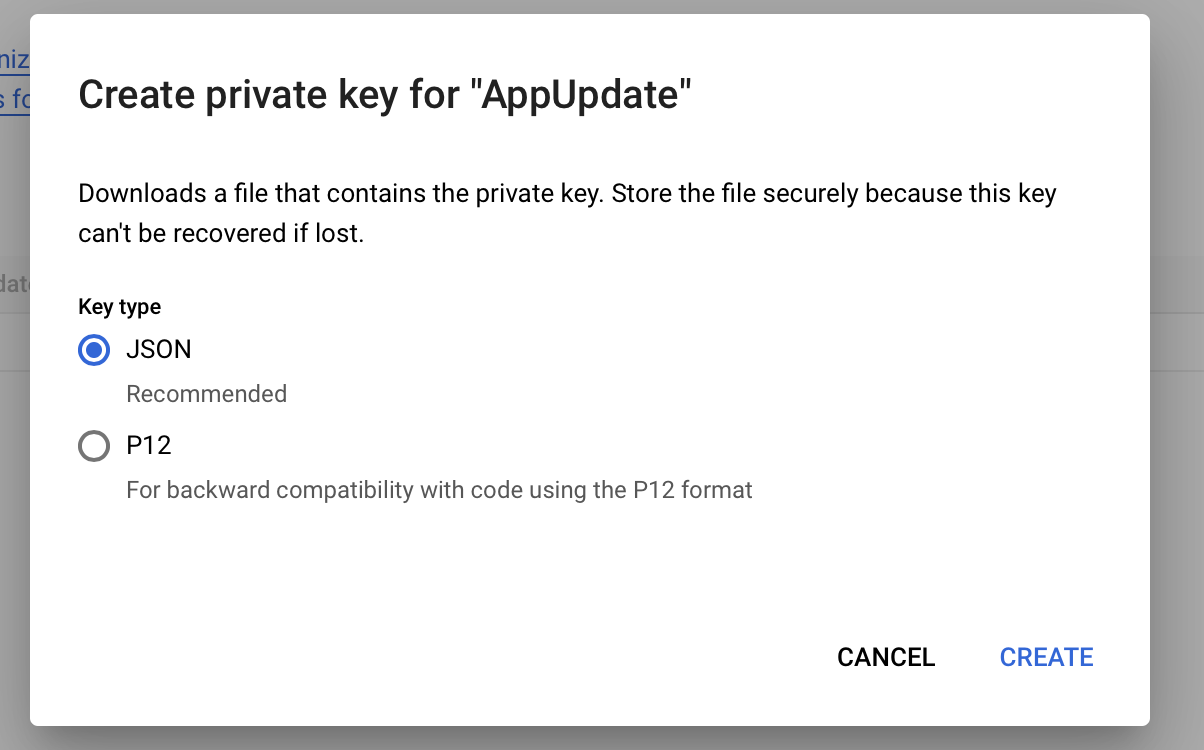
- Keep the downloaded file in a safe place, because it can't be re-downloaded if you lose it.
- Go back to Google Play Console, and click Done on this popup.
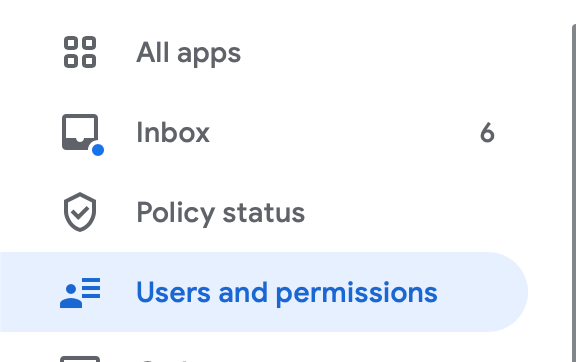
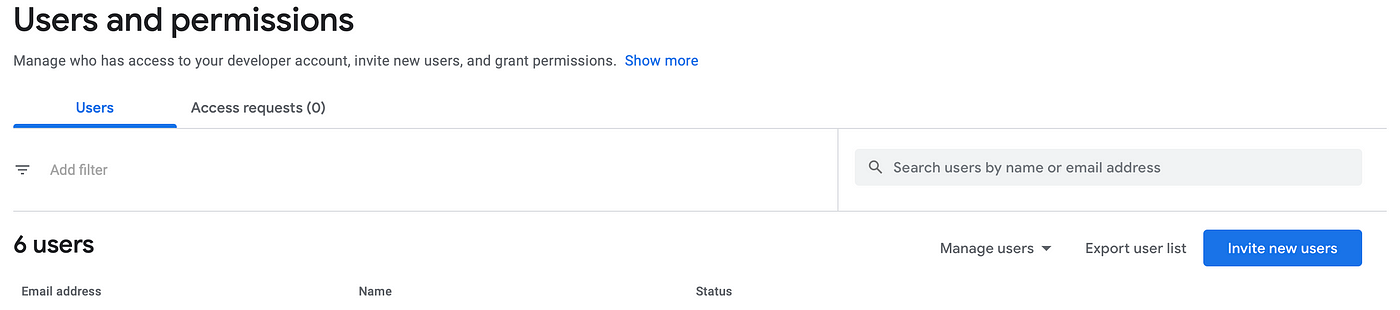
- Select Users and Permissions then Invite New User
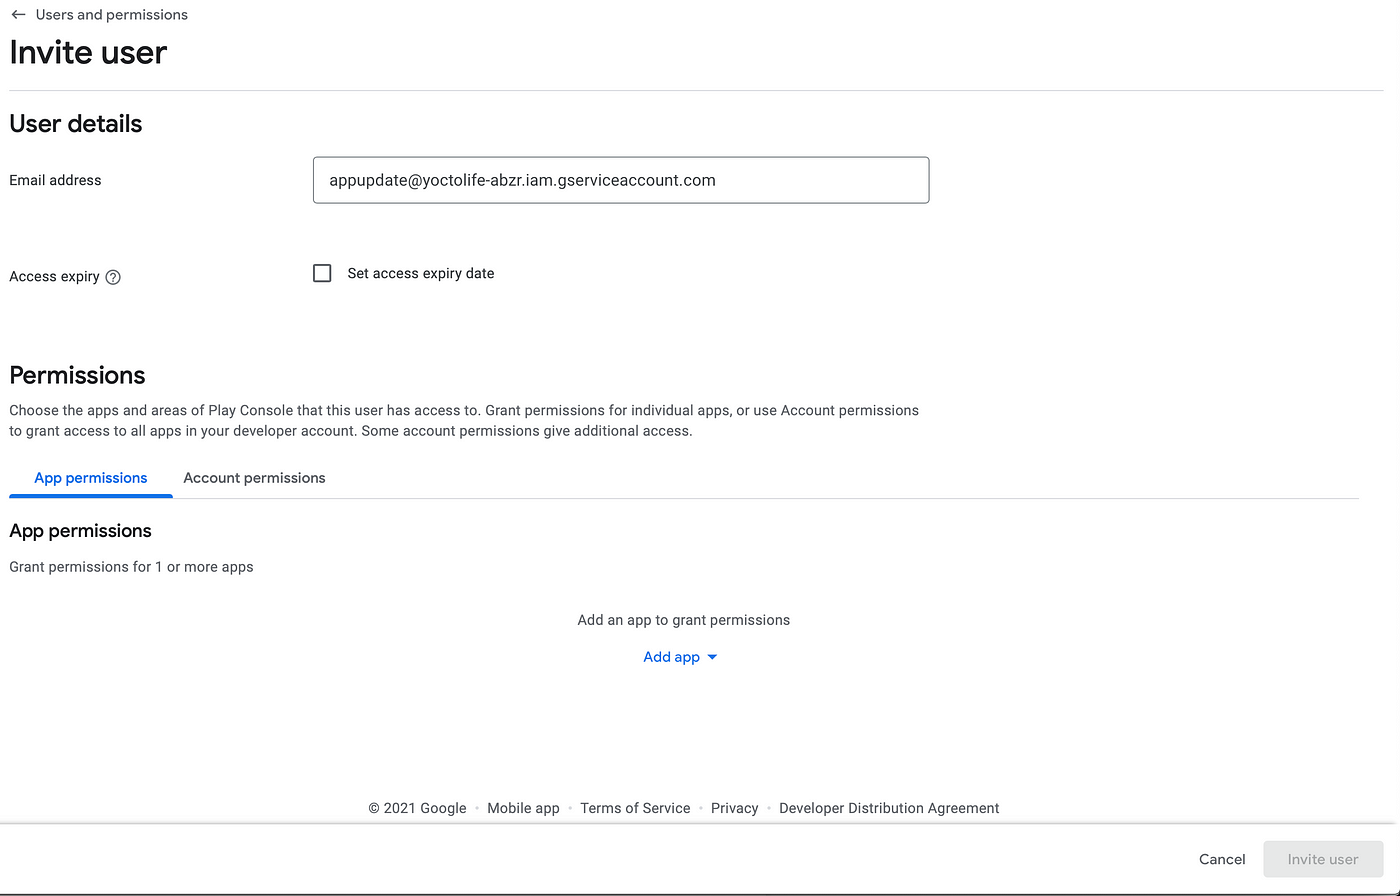
- Open the .json file, and copy client_email and paste it in Email Address, and click Add app at the bottom, and select the app you want to add In App Updates to.
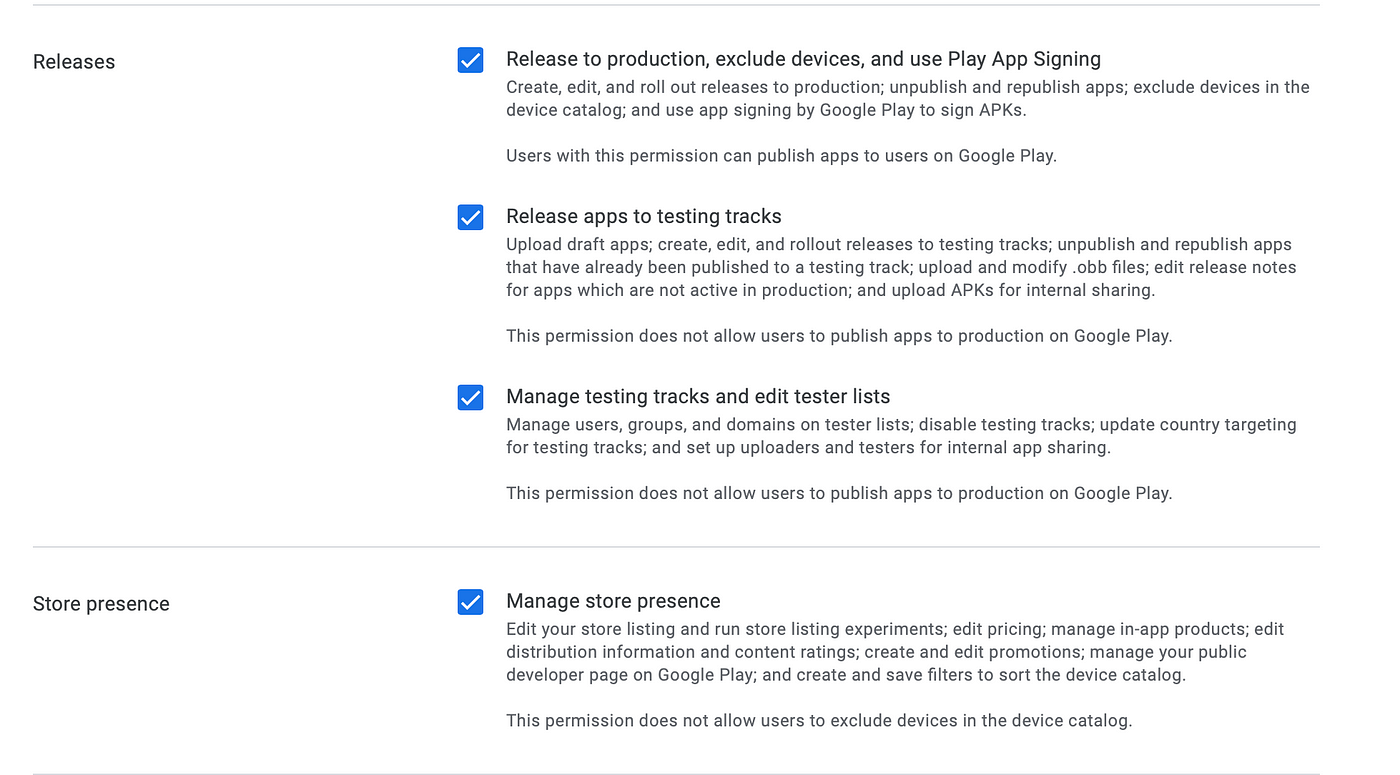
- In the permission popup, checklist 4 as shown below, and click Apply, and click Invite User.
Now after doing all the steps above, we can upload the application via the Play Developer API to add Update Priority. Here we will use one of the packages that I made myself to facilitate the upload process called abizareyhan/playpublish. But before that, make sure the application containing the In App Updates code that has been written above has been uploaded to Google Play, you can use the normal method through the Google Play Console, without having to add Update Priority because the goal is for the In App Updates popup to appear, after that just proceed to the steps below.
Upload via Play Developer API
- First, install the playpublish package via npm
> npm i -g playpublish
- Run the playpublish command, and follow the remaining steps
> playpublish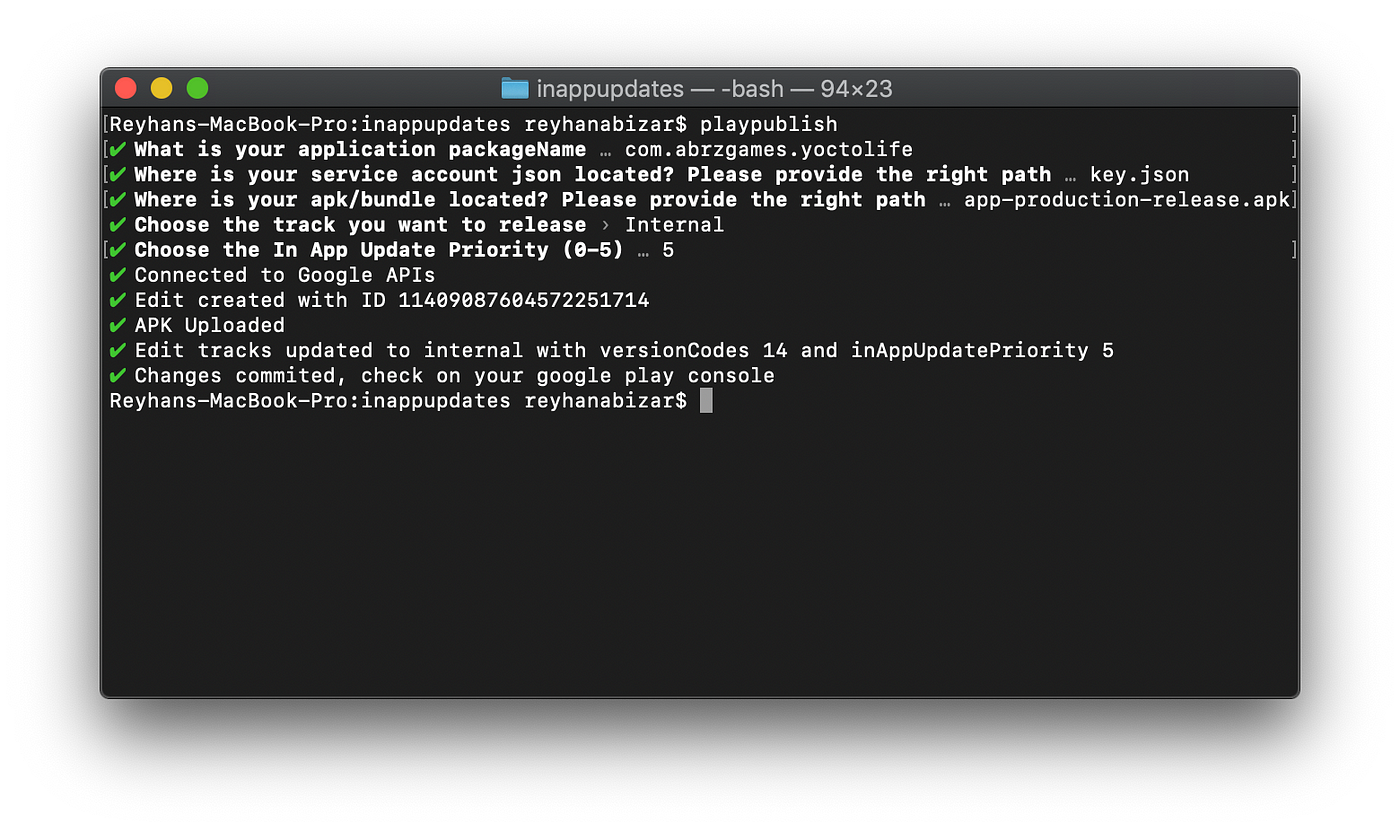
Try to keep the service account json and apk or app bundle files in the same folder to make it easier to write the path.
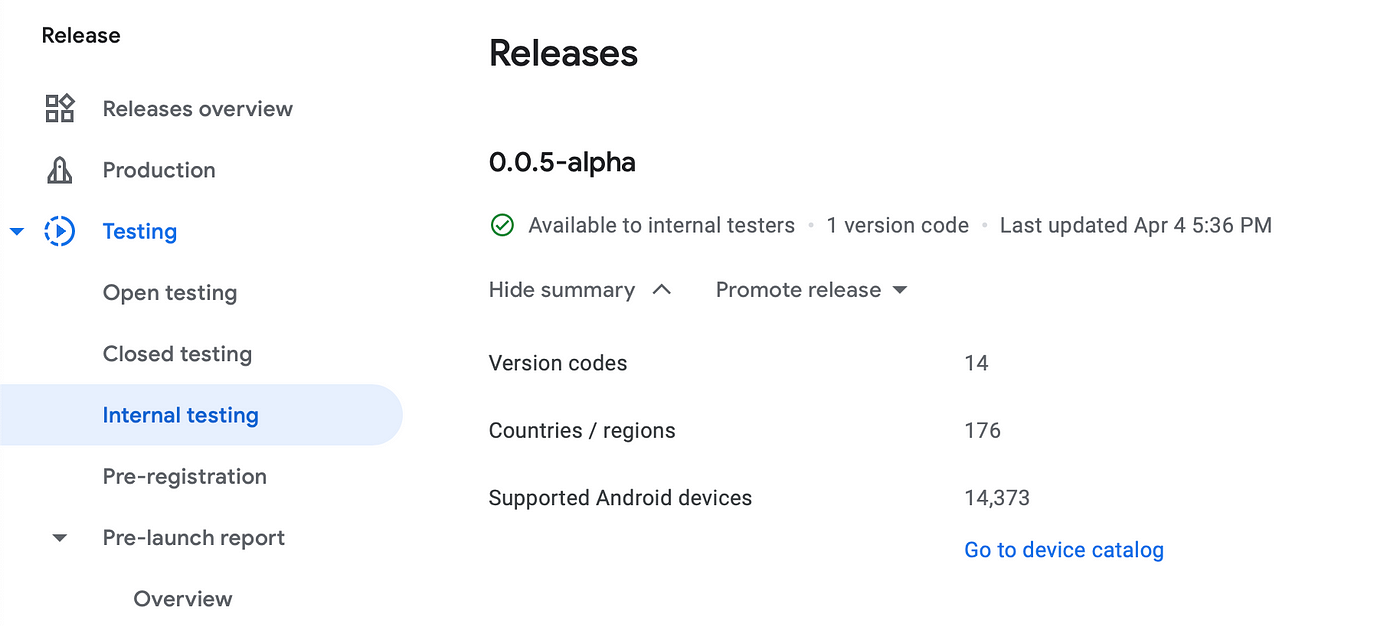
- If it works like the image above, you can check it directly in the Google Play Console. In this scenario what is uploaded is versionCodes 14 to the Internal Testing track and inAppUpdatePriority 5.
Conclusion
Now you know how to add Google Play In-App Updates to your Android app. It is a great way to keep users with the latest version without much hassle. Start with simple, then go advanced if you need.
Remember to check official docs for updates, since things change. With this, your app stays fresh, and users stay happy. Good luck with your coding!